Etching is a crucial step that must be done to prepare concrete for painting. When you are applying a coating of any kind to concrete, the coating must be able to adhere to the surface. Etching is a deep cleaning process that maximizes the bond between paint or protective sealants and the surface of the concrete. Without proper surface prep, you could end up with a coating that flakes or rubs off much sooner than it should.
One of the main reasons for needing to know how to etch a concrete floor for painting is because of laitance. Laitance is a mixture of fine particles of cement dust, lime and sand that accumulate on the surface of concrete. When there is too much moisture in the concrete, the laitance mixture can look milky. And without a laitance-free surface, your concrete coating won’t adhere.

How much product do you need?
Old Practices
For many years, etching concrete with a strong acid etching solution and then washing the etching solution off with water was the main way people learned how to etch a concrete basement floor. However, it’s no longer recommended because acid etching concrete with strong acid creates inconsistent results. While it does remove laitance, it does not remove oils and other water-soluble materials. Not to mention, the strong acids can be hazardous if used improperly or if accidents occur.
When you’re looking up how to etch a concrete floor for painting, it’s common to see muriatic acid promoted as a concrete etching product. Muriatic acid is a diluted and impure solution of hydrochloric acid (it contains iron rather than pure hydrochloric acid).
Just because it’s diluted does not mean it’s safe! It’s still sold in high concentrations — concentrations that are capable of severely burning clothing and skin with just seconds of contact and corroding everything from plastics to metals. Inhaling muriatic acid fumes can burn the lungs and the lining of the nose. Just a splash in the eye can cause irreversible blindness.
Newer, Safer Practices
Today, safer, eco-friendlier and more consistent etching methods are used to prepare a concrete floor for painting. DRYLOK® has developed safer and more effective etching products.
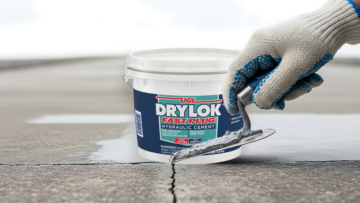
DRYLOK®‘s Concrete and Masonry Etch & Cleaner is a ready-to-use liquid that has no harmful fumes, and its sulfamic acid formulation is safer than muriatic acid and easily cleans up with water. DRYLOK®‘s Etch & Cleaner is a powdered mixture that also cleans up with water and only requires one application to properly etch a surface.
Both products are highly effective in etching galvanized metal, masonry, stone, tile and brick. They both remove efflorescence, which appears as a salt deposit on the surface of concrete, as well as excess mortar.
Both products clean the surface and leave it feeling slightly rough like sandpaper, which is the way you’ll know the surface is properly prepared. Let’s look at the more detailed steps of how to etch a concrete garage floor or how to etch a basement concrete floor using these products.
Step 1: Gather Your Safety Products and Gear

Even though these products are much safer than muriatic acid,you should still avoid contact with eyes, skin and clothing. Utilize eye protection goggles with side shields, gloves and protective footwear. Wear an acid-proof apron to protect clothing. Since these products are capable of etching galvanized metal, do not use a galvanized container to mix or hold while applying.
DRYLOK® Etch applies with a stiff brush. DRYLOK® Concrete and Masonry Etch & Cleaner applies with an acid-resistant sprayer or a synthetic brush. For horizontal surfaces, Etch & Cleaner can even be applied using a plastic garden watering can with a sprinkling head or an acid-resistant sprayer.
Step 2: Purchase Enough Etching Product to Complete the Job
Before you begin, make sure you have enough acid etching product to complete the job. One gallon of DRYLOK® Concrete and Masonry Etch & Cleaner covers 300 to 600 square feet. One 12-ounce container of DRYLOK® Etch & Cleaner covers 300 square feet when mixed with 1 gallon of water. Before purchasing, measure out your space to calculate how much product is needed.
Step 3: Prepare the Area
Prepare the area you plan to etch by removing any furniture or other obstructions. Etching solutions can permanently damage most items made of plastic and metal, so move them completely out of the way before you start.
If the area you plan to etch contains or is adjacent to any landscaping or other plants, cover them with protective materials. If you’ll be etching up to any adjacent walls or other surfaces, prepare these in the same way. Apply the etching product to the walls in the same way as described below.
Step 4: Clean the Concrete

After removing furniture and other items, give the area a good sweeping with a stiff push broom. Remove as much of the accumulated dust, dirt and grime as you can. The etching solution is effective at cleaning, but it will be more effective and provide you with a more evenly etched surface if the surface is as clean as possible to start.
Any little piece of debris that is in the acid’s way can lead to an inconsistent finish. Using a power washer can be one of the best ways to ensure that your concrete is as clean as possible.
Step 5: Apply a Degreaser
Clean the concrete with a degreaser to remove oil or grease. This is particularly important if you’re going to etch a concrete garage floor. If your garage was used for vehicles, there is likely oil and grease on the surface, and etching solutions can’t penetrate through oily substances. To remove as much oil and grease as possible, scrub your concrete with a commercial degreaser.
Step 6: Clean With Water
Hose down the entire area to remove the degreaser. Be sure that you have washed away all traces of the oil, grease and degreaser. Then, use a sprayer with water so that the entire surface of the concrete to be etched is damp but no puddles are present. Allow the concrete to stay damp like this until the acid is applied.
Step 7: Prepare the Acid Etching Solution

Choose a day to apply your etching solution when the air and surface temperature is above 50° Fahrenheit. The liquid, ready-to-use DRYLOK® Etch & Cleaner requires no mixing. To use the powder Etch & Cleaner, dissolve the entire 12-ounce container in 1 gallon of warm water in a plastic container — never use a metal container as high volumes of product can corrode the container.
To use the powder Etch & Clean to etch concrete before painting, use 12 ounces to a 1⁄2 gallon of warm water. Take care while pouring your powdered solution into the water by using rubber gloves and eye protection. NEVER pour water into acid.
Step 8: Test the Etching Solution
It is wise to test your etching solution on a small, out-of-the-way place to be sure it works before you apply it to your entire space. The etcher should begin to bubble and react as soon as you apply it. If there’s no foaming action, that means there is a sealer on the concrete preventing the etcher from penetrating. In this case, the sealer must be removed using a suitable sealant removal or by grinding the sealer off the surface of the concrete before pursuing acid etching.
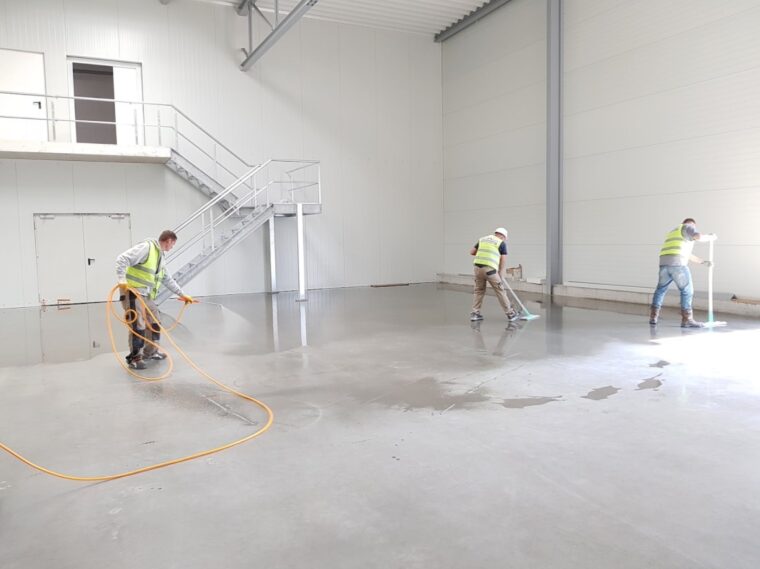
Step 9: Apply the Etching Solution
When you’re ready to apply, be sure that your surfaces are slightly damp. For vertical surfaces such as walls, apply the mixed or ready-to-use liquid concrete etching solution with an acid-resistant sprayer or a synthetic brush. For horizontal surfaces, apply the etcher using a plastic garden watering can with a sprinkling head or an acid-resistant sprayer.
Do not pour all of the liquid etcher onto one spot with the intention of spreading it out from there. This can leave some of the etching solution “used up” before it reaches the rest of the surface. You will want an even application for the best results. Instead, apply it in one section at a time using either a sprayer or a stiff brush or broom.
If you’re spraying, use a squeegee to move the solution around to ensure each part of the surface is equally coated. The floor needs to stay damp the entire time you are etching — don’t let the solution dry on the floor. As soon as you apply the etcher, it should start foaming. Allow the etching solution to remain on the concrete until the foaming stops.
Step 10: Leave the Etching Product on for the Recommended Amount of Time
If the label of the product has a recommended amount of time to leave the product on, follow those instructions. If not, wait for the acid to react with the floor, and don’t remove it until the reaction is completed, usually when it stops bubbling.
Leave the powder etch solution on for 20 to 30 minutes before washing off with clean water. If you can see that there are parts of the floor where the acid does not seem to be evenly applied, you may need to repeat the process after using a second application of degreaser or manual grinding to remove the grease, oil or sealer from that spot.
Step 11: Neutralize the Surface, If Needed
Some etching products require a neutralizing solution to complete the process. The above-mentioned DRYLOK® products do not require a neutralizing solution, but if you’re using another product, be sure to follow the package directions.
Step 12: Hose Off Thoroughly

When the etching solution has completed its work, hose it off completely. Triple rinse the surface with a strong stream of water and use a clean bristle brush to scrub while rinsing to ensure all the etching material is washed away.
When rinsing off the etching solution, make sure it doesn’t splash on other objects or nearby greenery that you don’t want damaged. Consider using a push broom to gather the water into one area and removing it with a shop vacuum.
Avoid washing your etching solution down any city drains, as disposal in this manner could be against the law. If your etching solution is neutralized, you may be able to pour it down a drain.
Step 13: Check the Etched Surface
After all of the etching material is washed away, allow the surface to dry completely. Then check the etched surface by applying a few drops of water. The water should penetrate quickly. If it does not, reapply the etching solution following the above steps.
In addition to the water test, feel the surface of the concrete — a properly etched concrete surface should look and feel like 120-grit medium sandpaper. If it is properly etched, your surface is now ready for you to apply your sealant or coating.
Successfully Etching a Concrete Floor
If you’re curious about how to paint a concrete basement floor without etching it, the answer is don’t do it! Concrete has a rugged reputation, but it can be susceptible to water damage without proper protection. New concrete must be etched before applying the topcoat. The smooth surface of un-etched concrete won’t bind as strongly with sealants, and as a result, you’ll see your new sealant peeling and lifting away as it fails to adhere to the surface.
Have more questions about how to etch a concrete floor for painting it or how to choose your concrete etching solution? Our industry experts are ready to help you at every step along the way. Contact the DRYLOK® home improvement experts today or find a store to get your project started. We’re here to ensure your success.