Water damage of any kind is a nightmare for most homeowners. Since a basement is below grade, many people focus their efforts on that part of the house but waterproofing a concrete garage is just as important.
There is always the potential for heavy rains to infiltrate a home or garage, so it’s important to be prepared and protect your space. After all, a garage floor has a much more important job than serving as a slate for your kids to create their chalk masterpieces.
A protected garage floor helps secure your car and other valuable household items you may have stored from dust, dirt, etc. Concrete is often viewed as a tough, durable and practically indestructible surface, but it needs a waterproof covering to fully protect it.
Choose Your Material
Before you select material, you must stop the water intrusion. Makes sense, right? The most common place for water to enter is the floor wall joint (the area where the floor meets the wall). With this being said, you will need to seal that area to prevent any more water from flowing in.
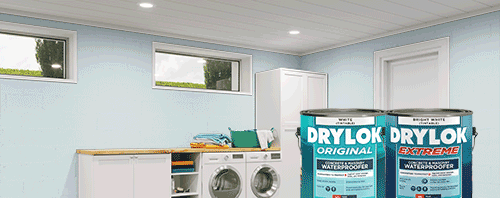
DRYLOK® Fast Plug is a great solution for this while concrete block or masonry walls can be coated with DRYLOK® Original Masonry Waterproofer or DRYLOK® Extreme Waterproofer to stop wind-driven rain from entering porous masonry. DRYLOK® Floor and Wall Masonry Waterproofer can also be applied directly to the floor to stop groundwater from entering up through the floor and top coated with a good quality latex concrete floor paint. Note: DRYLOK® Floor and Wall Masonry Waterproofer must be top coated with a paint that holds up to automobile traffic in a garage environment.
Once you’ve stopped water from intruding, you can start looking for a floor paint specifically formulated to coat masonry. Many of them go on as easily as ordinary paint, but it’s important to know that they perform differently.
For the way most people use their garage floor, a full 2‑part epoxy coating is usually overkill. In addition, full epoxy coatings are very difficult to apply with very short open times and are best left to professionals. If any moisture is present in the concrete, popping of the coating or peeling is a real possibility. In addition, fixing these common problems is not possible with a 2‑part epoxy coating.
A latex garage floor paint outperforms ordinary paint while protecting your garage floor from traffic, repeated washings, weather, acids, alkalis and other common garage chemicals. It is specially formulated with a Ph level compatible with that of concrete. Ordinary paint will not be compatible with the high acidity of the concrete and will peel off in sheets.
However, if you want the enhanced protection of epoxy, try a 1‑part epoxy latex garage floor paint, which has a latex base with the additional component of epoxy resin for added durability. Not only is it easy to apply, but cleanup is a breeze.
You should also ensure your paint is non-skid, to reduce the chance of occupants slipping and/or falling.
So, how do you apply a garage floor with epoxy garage floor paint? Here are 7 steps to help explain the process.
7 Steps for Waterproofing a Garage
Step 1: Prepare the Space
Remove everything from the garage, including anything hanging from the walls and ceiling. Everything needs to be cleaned and degreased. The best way to do this is by power washing, to ensure your space is fully clean and ready to go.
It’s crucial that your garage floor coating is applied to clean concrete so that the coating will bond and cure properly. However, to avoid damaging the concrete, use a pressure setting below 1,750 psi. Concrete can act like a sponge, so pressure washing and general cleaning may trap residual moisture in the concrete if not done correctly.
Make sure to leave time for the concrete to dry completely after being cleaned. Remember, a pressure washer can force water deep into the concrete and before applying any concrete floor paint the moisture needs to be evaporated. Try this simple test to check for trapped moisture:
Tape a 12” x 12” piece of 3 mil plastic or aluminum foil tightly on all four edges to the surface.
Remove it after 24 hours.
If the floor side of the plastic or foil is damp allow additional drying and then repeat the test. A dehumidifier or fan may help to eliminate residual trapped moisture.
Another essential part of preparing the floor is making sure that the surface is fully acid etched. You can use etch as the cleaning solution, as well; however, it is important that the surface has the feel of course sandpaper so the coating has something to adhere to.
Step 2: Inspect Your Garage
Inspect your garage floors and walls for any damage. If there are any low spots, dents, or depressions, they will need to be repaired first.
If your garage floor is flat, look for any cracks that may have formed in the concrete. They’ll need to be sealed (see step 3) before applying your garage floor covering, as cracks can be a way for moisture and toxic radon gas from the soil to penetrate.
Step 3: Fill Cracks With Masonry Crack Filler

Using a masonry crack filler to fill any gaps or cracks is important if you want a quality finish. A masonry crack filler waterproofs, repairs and seals cracks and mortar joints in concrete floors, walls and steps. It dries to the color of concrete and can be painted. DRYLOK®’s filler comes ready to use with an intuitive caulk gun applicator.
Use the masonry crack filler to seal in any cracks, holes or seams. Allow yourself a 12-hour set time before moving on to the next step. It is important to note that most 2‑part epoxy floor paints will not be able to be applied over another coating.
Step 4: Choose The Correct Garage Floor Paint
There is no need to apply a primer when you use DRYLOK® Latex Concrete Floor Paint. This is an all-in-one paint and primer that applies easily to floors. It is naturally non-slip and cleans up easily with soap and water. There are seven colors of this durable garage floor paint to choose from, plus a tint for custom options and a wider variety of styles.
For the added durability and chemical resistance of an epoxy resin, there is DRYLOK® E1 Latex 1‑Part Epoxy Concrete Floor Paint. It goes on just as easily as paint and is also an all-in-one paint and primer. There’s no need to mix strong-smelling components, as it comes ready to apply, and it is available in two popular grays and a tint base for more options to choose from.
The DRYLOK® Latex Concrete Floor Paint is naturally non-slip. The DRYLOK® E1 Latex 1‑Part Epoxy Concrete Floor Paint has a semi-gloss sheen and a non-skid additive is recommended for extra protection and peace of mind.
Step 5: Apply Waterproof Paint to Garage Walls
Schedule your project for a warm, rain-free day with temperatures above 50°F or higher.
If the garage structure is made of concrete or masonry blocks, apply two coats of masonry waterproofer, following the label instructions. DRYLOK® Masonry Waterproofers go on with a brush designed for heavy bodied coatings or roller. If the garage is finished and the masonry structure is framed out and drywall has been hung, use a good quality latex paint with a gloss finish for easy cleaning.
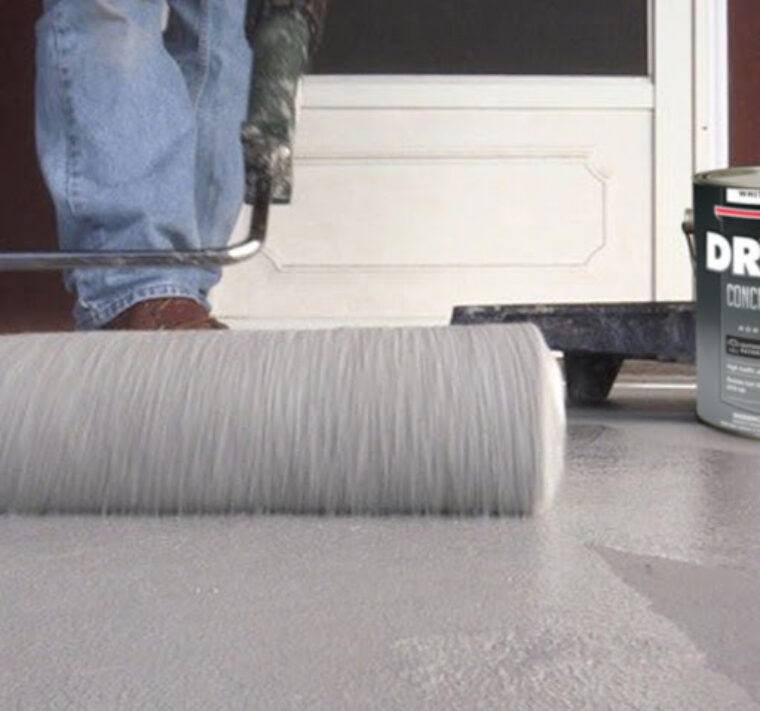
Step 6: Apply Concrete Floor Paint to Garage Floors
The two DRYLOK® floor paint formulas can be applied by brush or roller. No fancy application tools are needed.
When using DRYLOK® Latex Concrete Floor Paint, thin the first coat with one pint of water per gallon of paint. Apply the latex paint with a good quality nylon/polyester blend brush for the first coat and a brush or 1/4‑inch nap roller for the second coat.
If you’re using the DRYLOK® E1 Latex 1‑Part Epoxy Concrete Floor Paint, it does not need to be thinned. Apply with a 3/8‑inch nap roller or nylon polyester brush. Allow the first coat to dry for 4 hours, then apply the second coat in a cross direction to the first coat to achieve color uniformity. You should not apply more than two coats.

Apply your garage floor covering following the procedures and application tools listed above. Allow 4 hours for the first coat to dry, and then reapply a second coat.
If desired, you can add up to 2 ounces of DRYLOK® Non-Skid Texture Additive to the E1 Latex 1‑Part Epoxy Concrete Floor Paint to improve traction.
Remember to work from the back wall to the doors as to not to paint yourself in a corner. It is also important when using more than one gallon of paint to mix the gallons together to create a uniform color. This procedure is called boxing.
Step 7: Replace Your Belongings
Once you are confident that the walls and floors have dried — we recommend waiting a full 24 hours — all you have to do to start enjoying your new garage floor is to reintroduce your belongings. Your garage will be waterproofed and protected for years, and you’ll have peace of mind knowing all your valuables are safe.
Protect Your Garage With Waterproofing Paint And Beautify With Floor Paint
There is no other floor in the house that works as hard as a garage floor. Concrete seems hard as a rock, but it is a very porous material that can be easily damaged if it’s not protected.
When you coat your garage floor, you’re adding a protective layer that seals the pores, keeps it from absorbing any moisture and extending its life. Any liquid that collects on the surface can be easily wiped away, and your garage floor will look better and last longer.
To protect for even longer, you can apply paste wax on the coating where your tires rest. This will help eliminate the friction caused by hot tires delaminating the coating because of expanding and contracting as the tire cools.
Do you have more questions about how to waterproof a garage floor or how to choose the right garage floor paint? If so, don’t hesitate to contact the specialists at DRYLOK® today. Our industry experts are ready to help you.