When preparing a wall for painting, one key component that shouldn’t be overlooked is the use of a wet wall bonding primer. This crucial step can significantly affect the overall quality of your paint job, and ensure a smooth, even and durable finish.
Through this guide, you will be educated on the ins and outs of using wet wall bonding primer for a professional finish that will elevate your paint job to the next level.
What is a Wet Wall Bonding Primer?

A wet wall bonding primer is not just a regular primer — it is a product uniquely formulated to bring added durability and superior adhesion to your paint job. It is specifically designed for application on wet, damp or dry surfaces to ensure consistent performance across varying conditions.
DRYLOK® Wet Wall Bonding Primer is a specialized product created to provide the best starting point for masonry projects, whether interior or exterior. Its high-quality acrylic formulation is designed to give superior bonding capabilities with various types of surfaces. This product has excellent adhesion, can resist efflorescence and fights against mold and mildew.
One of the distinguishing features of this primer is its versatility — it can be applied to dry, wet, bare or even pre-coated masonry, concrete, concrete stucco, or stone structures. Unlike some other products in this category, it is safe to apply on freshly poured, alkaline green concrete with a pH level of up to 13.0.
How to Use DRYLOK Wet Wall Bonding Primer

Preparing the Surface
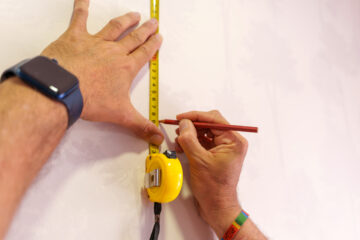
Before applying the primer, it’s critical to thoroughly prepare the surface. To get a better result, it is important to adequately prepare the wall surface by eliminating any paint that is loose or peeling and repairing any cracks or holes that may exist. This will ensure that the surface is in good condition and as smooth as possible, to allow the bonding primer to work effectively.
Cleaning and Degreasing
Cleaning the surface is an integral part of the preparation. You must remove all dirt, grease or oils from the wall as these substances can interfere with the primer’s ability to bond to the surface. Use a mild detergent or a specialized cleaning solution and rinse thoroughly to ensure that the surface is absolutely clean.
Sanding and Smoothing
For optimal results, sanding the surface to create a smoother texture is advised. This will help the primer adhere better and will enhance its overall performance. Make sure to dust off any residues after sanding.
Application Process
Gathering Materials
Before you begin, gather all the necessary materials. This includes DRYLOK Wet Wall Bonding Primer, paint brushes or rollers, a paint tray, sandpaper, cleaning materials and protective gear such as gloves and safety glasses.
Apply the DRYLOK Wet Wall Bonding Primer

Start the application process by pouring the primer into a paint tray. Then, using a brush or roller, apply the primer evenly across the surface and ensure that all areas are adequately covered. Carefully follow the manufacturer’s instructions for best results.
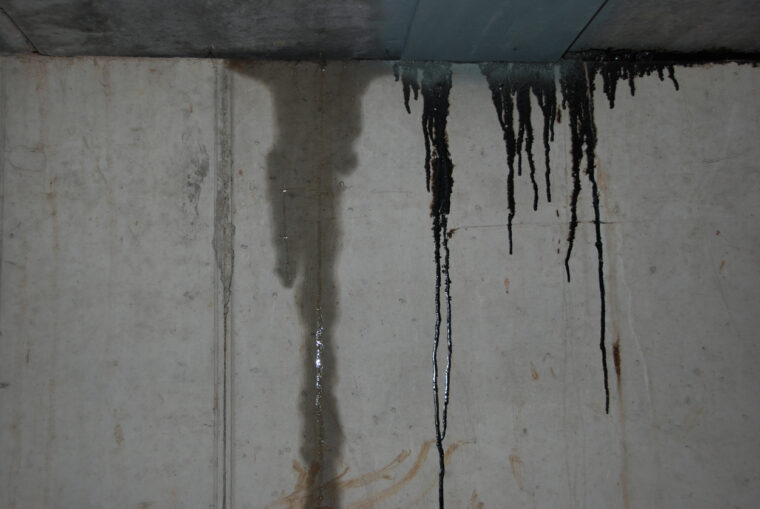
When it comes to dealing with wet-wall applications, DRYLOK Wet Wall Bonding Primer has exceptional utility. The primer can be applied to a wall that is wet, but not actively leaking. However, in the case of seasonal leaking, the application should be done during a dry, rain-free period. If the wall is continually leaking, the primer can still be used following a specific procedure.
First, drainage holes should be drilled at the bottom of the wall to release the water. Next, the holes need to be patched up with DRYLOK Fast Plug. Finally, the Wet Wall Bonding Primer can be applied to a properly prepared surface.
This product can also be applied to floors for added protection. However, the final topcoat needs to be a product that is formulated for horizontal foot traffic, like DRYLOK Latex Concrete Floor Paint.
Drying and Curing
Allow the primer to dry a minimum of 1 hour for a single coat application. Before applying a second coat, you should wait a minimum of 2 hours. Curing times may vary depending on temperature and humidity levels. Ensuring the primer has properly dried before applying your topcoat is vital for achieving a long-lasting, high-quality finish.
Clean-up and Maintenance
Clean your tools promptly after use, using soap and water. As for maintenance, it’s recommended to check the condition of the paint periodically and apply a new coat of primer and paint as necessary.
Discover the Best — Wet Wall Bonding Primer from DRYLOK
Choosing DRYLOK Wet Wall Bonding Primer is choosing longevity and outstanding results. Our primer has been meticulously formulated to withstand the test of time, to ensure that your finished work retains its beauty and integrity for years to come.
To get started with your next project, explore our product page on our website. You’ll find a wealth of additional information about the primer, including detailed specifications and useful application tips.
When you’re ready to purchase, our handy retailer locator will point you to the nearest store that carries DRYLOK Wet Wall Bonding Primer or any of our other products.